Your extensive kayaking experience is not enough for the Inside Passage; survival depends on mastering the unique tidal hydraulics of British Columbia’s coast.
- The primary danger is not tidal height, but extreme current velocity created by geographic chokepoints, capable of overpowering any paddler.
- Standard safety gear is insufficient. A dry suit is a mandatory survival system against the coast’s lethally cold water temperatures.
Recommendation: Shift your mindset from relying on physical skill to conducting rigorous, physics-based risk analysis for every water crossing. This guide provides the tools.
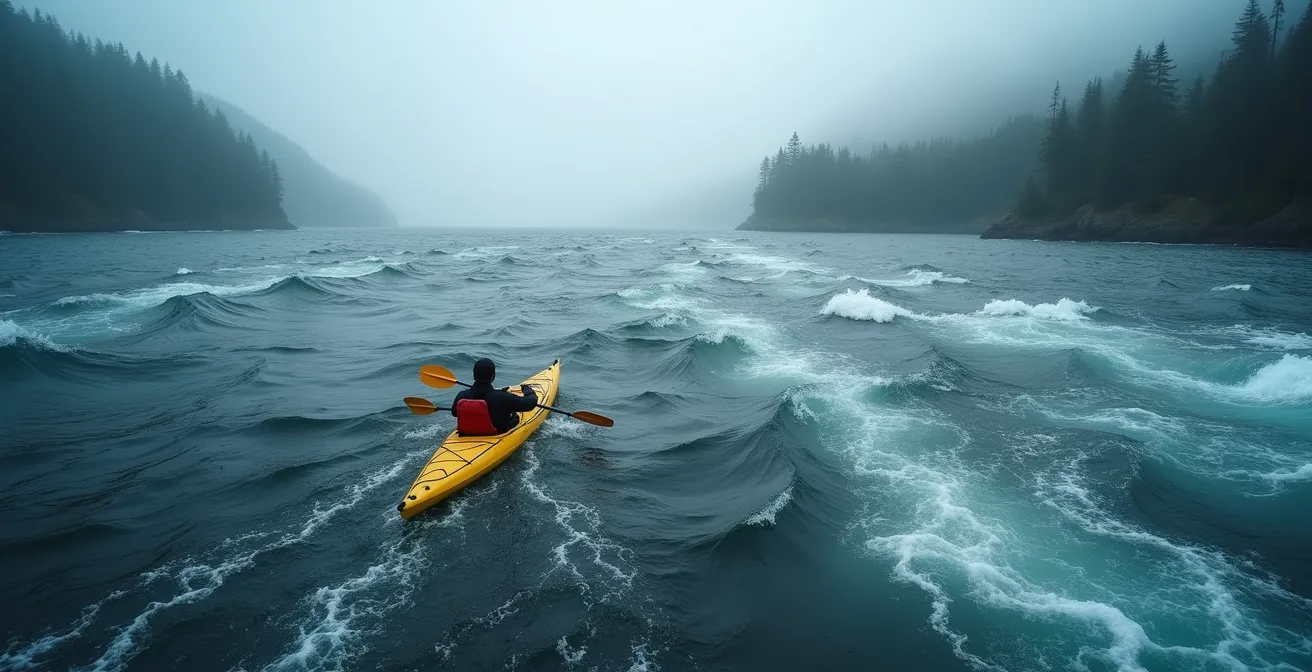
You have logged the miles. You know how to read a weather forecast, brace into a wave, and roll your kayak in rough water. You are an experienced paddler, confident in your skills and ready for a challenge. But the Inside Passage of British Columbia is a different kind of challenge, one where your physical abilities are secondary to your understanding of hydrodynamics. Many seasoned kayakers arrive here assuming their skills will see them through, a dangerous underestimation of the forces at play.
The common advice to “check the tide tables” and “pack warm gear” is dangerously simplistic for this environment. It fails to capture the reality of BC’s coastal waters, where predictable ocean tides are funnelled through a maze of narrow channels and islands. This creates tidal hydraulics of immense power, with currents that can flow faster than any human can paddle. It transforms calm-looking passages into raging rapids of whirlpools and overfalls in a matter of minutes. The threat isn’t just getting wet; it’s about being caught in a ‘compression zone’ where the water itself becomes an inescapable trap.
The true key to survival is not to paddle harder, but to think like a hydrologist. It requires a fundamental shift from a skill-based approach to one of predictive analysis. This guide is built for the experienced paddler who needs to bridge that knowledge gap. It’s not about basic paddling technique; it’s about deconstructing the specific, lethal dangers of the Inside Passage and providing the analytical tools needed to navigate them. We will move beyond generic warnings and into the specific calculations, gear mandates, and environmental observations that separate a successful expedition from a search-and-rescue operation.
This article provides a systematic breakdown of the critical safety knowledge required for a self-guided trip. The following sections cover everything from calculating safe crossing windows to understanding the gear that is truly mandatory for survival in these unforgiving waters.
Table of Contents: A Safety Guide to Navigating BC’s Inside Passage
- The Rule of Twelfths: How to Calculate Safe Crossing Windows?
- Skookumchuck Narrows: Why You Should Never Paddle Here Without Expert Training?
- Dry Suits vs. Wet Suits: Which Is Mandatory for BC Coastal Waters?
- Ferries and Freighters: How to Cross Shipping Lanes Without Getting Run Over?
- High Tide Line: How to Pitch Your Tent So You Don’t Wake Up Floating?
- Why Do the Tides in the Bay of Fundy Rise 14 Meters Twice a Day?
- Do You Need a Pleasure Craft Operator Card to Rent a Boat in Ontario?
- West Coast Trail Preparation: Can You Carry a 40lb Pack for 7 Days on Ladders?
The Rule of Twelfths: How to Calculate Safe Crossing Windows?
The single most important analytical tool for an Inside Passage kayaker is not a GPS, but the Rule of Twelfths. It is a mathematical method for estimating the speed and height of the tide at any given moment between high and low water. In most coastal areas, this is useful. In British Columbia, it is a critical survival calculation. The difference lies in velocity. In the constrained channels of the Inside Passage, this tidal flow accelerates dramatically. According to Canadian Hydrographic Service data, some BC tidal rapids can reach speeds exceeding 16+ knots. No kayaker, no matter how strong, can paddle against such force. Your strategy must be avoidance, and the Rule of Twelfths is your tool for prediction.
The rule works by dividing the tidal range and the time between high and low tide into sixths. The flow is weakest in the first and last hours (1/12th of the volume moves) and strongest in the third and fourth hours (3/12ths per hour). Your goal is to cross channels and narrows only during the “slack tide” window, the period of minimal current around the high or low water mark. Forgetting or miscalculating this window means you risk being swept into impassable rapids or held in place by an invisible wall of water.
The visualization below shows a paddler’s-eye view of the essential pre-trip planning: marking up official Canadian Hydrographic Service (CHS) charts. These aren’t just maps; they are data-rich documents that, when combined with the Rule of Twelfths, allow you to translate abstract numbers into a concrete plan of action for a safe crossing.

Applying this rule is not an academic exercise. It is a mandatory, daily procedure. Before you even put your kayak in the water, you must have your crossing times calculated and verified. This predictive analysis is the foundation of your entire risk management strategy. The following checklist breaks down the exact process for applying this rule in the context of a BC coastal expedition.
Action Plan: Calculating Your Tidal Window
- Obtain the high and low water times and heights from Canadian Hydrographic Service tide tables for your specific crossing point.
- Calculate the tidal range by subtracting low water height from high water height.
- Divide the time between high and low water into six equal periods (typically one hour each).
- Apply the 1-2-3-3-2-1 sequence: In hour 1, water rises/falls by 1/12th of range; hour 2 by 2/12ths; hours 3-4 by 3/12ths each; hour 5 by 2/12ths; hour 6 by 1/12th.
- Add a safety margin of at least 30 minutes on each side of your calculated slack water window for BC’s complex channels.
Skookumchuck Narrows: Why You Should Never Paddle Here Without Expert Training?
Skookumchuck Narrows is the ultimate expression of British Columbia’s tidal power and serves as a vital case study in why some passages are simply off-limits to unguided paddlers. The name itself is from the Chinook Jargon, meaning “strong water” or “turbulent water,” a profound understatement. Here, the tidal flow from the entire Sechelt Inlet is forced through a single, narrow opening, creating one of the fastest tidal rapids in the world. The volume of water creates a difference in water level of over two meters between one side of the rapids and the other.
This is a perfect example of a tidal compression zone. While the Rule of Twelfths helps predict the timing of slack water, it doesn’t fully capture the sheer violence of peak flow in such extreme locations. The currents here can exceed 16 knots, creating standing waves, massive whirlpools, and chaotic, unpredictable water. It is a world-class destination for expert whitewater kayakers who come specifically at peak flow, equipped and trained for those exact conditions. For a touring kayaker, even an experienced one, attempting to navigate Skookumchuck during its run is a fatal mistake.
The critical lesson from Skookumchuck is one of recognition and avoidance. Part of your trip planning must involve identifying these “Class V” tidal rapids and routing your expedition to avoid them entirely or transit them only at the precise moment of slack tide, with a significant safety margin. As the experts at Cruising Northwest note, the power of these rapids should never be underestimated:
When a rapid is flowing at maximum flood or ebb, there can be overfalls of several feet and strong whirlpools that can swamp a small boat.
– Cruising Northwest, Tides, Currents and Rapids in the Inside Passage
Places like Skookumchuck, Nakwakto Rapids, or Seymour Narrows are not obstacles to be overcome; they are natural phenomena to be respected from a great distance unless you have specific, localized training. As Comox Valley Kayaks, a local outfitter, emphasizes, local knowledge is indispensable when navigating BC’s challenging waters. Your safety depends on knowing which battles not to fight.
Dry Suits vs. Wet Suits: Which Is Mandatory for BC Coastal Waters?
For many experienced paddlers from warmer climates, a wetsuit is standard safety equipment. In the context of the Inside Passage, a wetsuit is dangerously inadequate. The discussion is not one of comfort, but of survival time. The water here is cold year-round. British Columbia’s Inside Passage waters maintain an average temperature of 8-10°C (46-50°F). At these temperatures, immersion without proper protection leads to incapacitating hypothermia in minutes, not hours.
A wetsuit works by trapping a thin layer of water against your skin, which your body then heats. This system fails rapidly in BC’s waters, creating a significant “thermal debt” that your body cannot repay. A dry suit, by contrast, keeps you completely dry. It works in conjunction with insulating layers worn underneath, creating a personal survival system. In the event of a capsize and a wet exit, a dry suit provides crucial hours of functional time to perform a self-rescue or await assistance. A wetsuit might only provide minutes.
The decision is therefore not a choice. For any multi-day expedition on the British Columbia coast, a dry suit is mandatory. It is as essential as your PFD and your paddle. While the initial cost is significant, it is an investment in your life. The remote nature of the Inside Passage means that rescue is often hours, if not days, away. Your equipment must be sufficient to keep you alive and functional for that entire period.
This table breaks down the critical differences and makes the case for why a dry suit is the only responsible choice for these specific conditions. As you review it, consider the remote context and the consequence of gear failure.
| Feature | Dry Suit | Wet Suit | BC Recommendation |
|---|---|---|---|
| Water Temperature Range | Below 15°C (59°F) | Above 15°C | BC averages 8-10°C year-round |
| Hypothermia Protection | 2-6 hours | 30-90 minutes | Critical for remote rescues |
| Mobility | Good with proper fit | Excellent | Essential for self-rescue |
| Cost | $800-3000 | $150-500 | Investment in survival |
| Durability | 5-10 years | 2-4 years | Better long-term value |
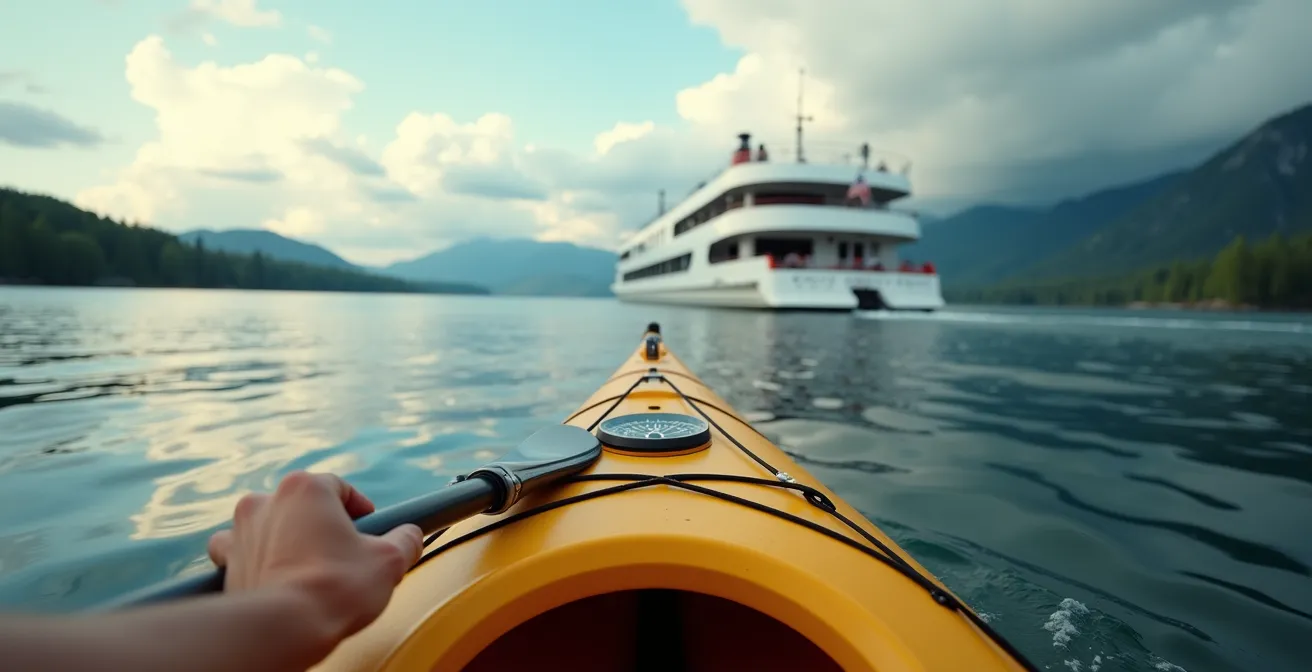
Ferries and Freighters: How to Cross Shipping Lanes Without Getting Run Over?
The Inside Passage is not a wilderness park; it is a major marine highway. Your small, low-profile kayak will be sharing the water with BC Ferries, cruise ships, container freighters, and tugs pulling massive log booms. The primary safety issue here is one of scale and physics, or vessel tonnage disparity. A freighter cannot see you, cannot stop for you, and cannot deviate from its course. The responsibility for collision avoidance rests 100% on you, the kayaker.
Your primary tools for managing this risk are your eyes, your compass, and a VHF marine radio. Crossing a shipping lane requires a clear strategy. You must cross at a 90-degree angle to the lane to minimize your time in the channel. Never attempt to paddle “in front” of a vessel; their speed is deceptive, and you will lose that race. Wait until the vessel has passed, and ensure you have a clear view of any other traffic before committing to a crossing.
A VHF radio is an essential piece of safety equipment. Monitoring key channels allows you to hear security calls from large vessels announcing their position and intentions, giving you advanced warning of their approach. In high-traffic zones, it is standard protocol to make your own “Sécurité” call before crossing a major channel, announcing your group’s position and intended route. The view from a kayak cockpit can be intimidating, but with proper procedure, it is entirely manageable.
It’s also crucial to remember that danger isn’t limited to large vessels. The “Cape Caution Surf Landing Incident” is a stark reminder of coastal hazards, where a group of four experienced paddlers all capsized in the surf zone. One required evacuation for an injury. This highlights that even the transition from sea to shore can be a high-risk maneuver that requires careful assessment of swell and wave patterns. Your vigilance cannot stop once the freighters are out of sight.
High Tide Line: How to Pitch Your Tent So You Don’t Wake Up Floating?
The same tidal forces that create hazardous currents also dictate where you can safely camp. One of the most common rookie mistakes on the BC coast is pitching a tent too low on the beach, only to be woken by waves washing through your campsite in the middle of the night. The Canadian Hydrographic Service reports that tidal ranges in the Inside Passage can exceed 4+ meters (over 13 feet) in many areas. This vertical change translates to a huge horizontal distance on a gently sloping beach.
Your first task upon landing is to identify the true high tide line. This is not just the current water’s edge. Look for the “biological high tide line,” the clear demarcation on the rocks where barnacles and dark marine algae stop and the lighter, terrestrial vegetation begins. This line shows you where the highest tides of a normal cycle reach. However, you must camp well above this line. Your tide tables are again essential here; check for the predicted highest tide during your stay, paying close attention to dates around the new and full moons, which create larger “spring tides.”
Furthermore, you must look for signs of storm surge. Scan the beach for the highest line of fresh debris—seaweed, driftwood, and plastic—that was pushed up by recent storms. This is your most reliable indicator of how high the water can *actually* get under severe weather conditions. A safe campsite is at least 3 meters (10 feet) vertically above this highest debris line. It might mean a longer walk to carry your gear, but it guarantees you won’t lose your kayak or tent to a rising tide. Always secure your kayaks by tying them to a large log or tree well above the storm surge line.
Checklist: BC Coastal Campsite Selection
- Identify the biological high tide line by looking for the transition from barnacles to drift logs.
- Check tide tables for the highest predicted tide during your entire stay (especially during new/full moons for spring tides).
- Look for storm surge indicators: the line of fresh debris above the normal high tide mark.
- Camp at least 3 meters vertically above the highest recent debris line.
- Choose durable surfaces like established sites, rock, or sand above the vegetation line to minimize impact.
- Secure all gear, including kayaks, well above the predicted high tide plus a storm surge safety zone.
Why Do the Tides in the Bay of Fundy Rise 14 Meters Twice a Day?
The Bay of Fundy, located on Canada’s Atlantic coast, is famous for having the highest tides in the world, reaching up to 14 meters (46 feet). This phenomenon is caused by a unique combination of factors, primarily tidal resonance. The bay’s size, shape, and depth cause the water to slosh back and forth at a natural frequency that happens to coincide with the timing of the Atlantic Ocean’s tide. This amplification, similar to pushing a child on a swing at just the right moment, creates the bay’s massive tidal range.
However, for a kayaker on the Pacific coast, the key lesson from the Bay of Fundy is that tidal height is not the primary measure of danger. While Fundy’s fame is its vertical range, the Inside Passage’s danger is its horizontal velocity. The geography of the Discovery Islands, for example, drags the ocean around all of Vancouver Island and forces it through narrow passages, creating some of the gnarliest tidal rapids in the world. As a result, the Inside Passage creates more dangerous currents despite smaller 4-5 meter ranges compared to the Bay of Fundy’s 14 meters.
This distinction is critical for risk assessment. An experienced paddler might look at a BC tide table showing a “mere” 4-meter exchange and underestimate the resulting current. In the constrained, fjord-like geography of the Inside Passage, that tidal volume is squeezed, accelerating the water to dangerous speeds. It is the tidal hydraulics—the speed and turbulence of the flow—that poses the greatest threat, not the absolute height of the water. Understanding this difference is fundamental to respecting the unique power of the Pacific coast.
Do You Need a Pleasure Craft Operator Card to Rent a Boat in Ontario?
In Ontario, as in the rest of Canada, anyone operating a motorized recreational boat is legally required to carry proof of competency, which is most commonly the Pleasure Craft Operator Card (PCOC). This requirement is enforced to ensure boaters have a basic understanding of navigation rules, buoyage systems, and on-water safety procedures. Rental agencies in Ontario are legally obligated to ensure a renter either has a PCOC or completes a rental boat safety checklist before taking a vessel out.
However, for the specific context of kayaking the Inside Passage, this provincial example serves mainly to highlight the framework of federal regulation. As a kayaker in British Columbia, you are operating under the same federal jurisdiction of Transport Canada. The rules regarding the PCOC are consistent nationwide: if your craft is human-powered, like a traditional sea kayak, you are not required to have a PCOC. The moment you attach any form of motor, including a small electric trolling motor, the PCOC becomes mandatory.
While the PCOC itself may not be required for your expedition, the safety knowledge it represents is absolutely essential. Transport Canada mandates specific safety equipment that every kayaker must carry, and failure to do so can result in significant fines and termination of your voyage by authorities like the Coast Guard or RCMP. The most critical regulations and equipment requirements for non-motorized craft in Canadian waters are addressed directly in the frequently asked questions section at the end of this guide.
Key Takeaways
- Hydrological Analysis is Paramount: Your survival depends on calculating safe tidal windows using the Rule of Twelfths, not on your physical paddling strength.
- A Dry Suit is Non-Negotiable: In BC’s 8-10°C water, a dry suit is your primary survival system against rapid-onset hypothermia; a wetsuit is insufficient.
- Avoidance Over Confrontation: Identify and avoid extreme tidal rapids like Skookumchuck. Master the protocols for crossing shipping lanes, as collision avoidance is entirely your responsibility.
West Coast Trail Preparation: Can You Carry a 40lb Pack for 7 Days on Ladders?
For many outdoor adventurers, hiking British Columbia’s West Coast Trail (WCT) is a benchmark of physical and mental endurance. It involves carrying a 40-pound pack over 75 kilometers of rugged terrain, including dozens of ladders, for about a week. It is a serious undertaking. However, using the WCT as a physical benchmark for an Inside Passage kayak expedition is a critical miscalculation of scale. The two trips are in completely different leagues of commitment and demand.
An Inside Passage trip is not a week-long trek; it is a months-long marine expedition. Recent expeditions on the Inside Passage average 72 days to complete. The physical demands are sustained over a much longer period, focusing on core and upper body strength for daily paddling distances of 20-30 km, often against wind and chop. The weight you manage is also exponentially greater. Instead of a 40-pound pack, you are handling a kayak loaded with over 100 pounds of food, water, and gear, which you must land and launch daily, sometimes on difficult, rocky shorelines.
The most significant difference, however, is your relationship with the environment. On the WCT, you can wait out a storm in your tent. On the Inside Passage, you must work with the tides. A weather window might be perfect, but if the tide is running against you in a critical channel, you cannot proceed. Conversely, you may be forced to paddle in challenging weather because it is your only safe tidal window for a necessary crossing. This relentless dependence on tidal cycles adds a layer of logistical complexity and stress that is absent from a land-based trail.
This table compares the two iconic BC adventures, highlighting the starkly different nature of the Inside Passage challenge.
| Challenge Type | West Coast Trail | Inside Passage Kayaking |
|---|---|---|
| Daily Distance | 10-15 km hiking | 20-30 km paddling |
| Load Weight | 40 lbs backpack | 100+ lbs loaded kayak |
| Primary Muscles | Legs, back, core | Core, shoulders, back |
| Duration | 7 days | 60-90 days typical |
| Weather Flexibility | Can wait out storms | Must work with tides regardless of weather |
| Resupply Points | None needed | Every 7-10 days minimum |
The Inside Passage is a world-class expedition, not a casual trip. Before launching, commit to mastering these hydrological principles and practice your calculations until they are second nature. Your survival depends on it.
Frequently Asked Questions about Kayaking Regulations in Canada
Do I need a Pleasure Craft Operator Card (PCOC) for kayaking in British Columbia?
No, a PCOC is not required for non-motorized kayaks. However, if your kayak has any motor (including electric), you must have a valid PCOC.
What safety equipment is legally required for kayaking in Canadian waters?
Transport Canada requires: a properly fitted PFD or lifejacket, a sound signaling device (whistle), a buoyant heaving line at least 15m long, and navigation lights if paddling between sunset and sunrise or in restricted visibility.
Are there fines for not having required safety equipment?
Yes, fines can range from $200 to $500 per missing item, and authorities like the Canadian Coast Guard or RCMP can prohibit you from continuing your journey until you are properly equipped.